

One of my
most popular posts last year was my denim bracelets, and I got a lot of
requests for a tutorial. So I have decided to kick off the new year by keeping
my promise.
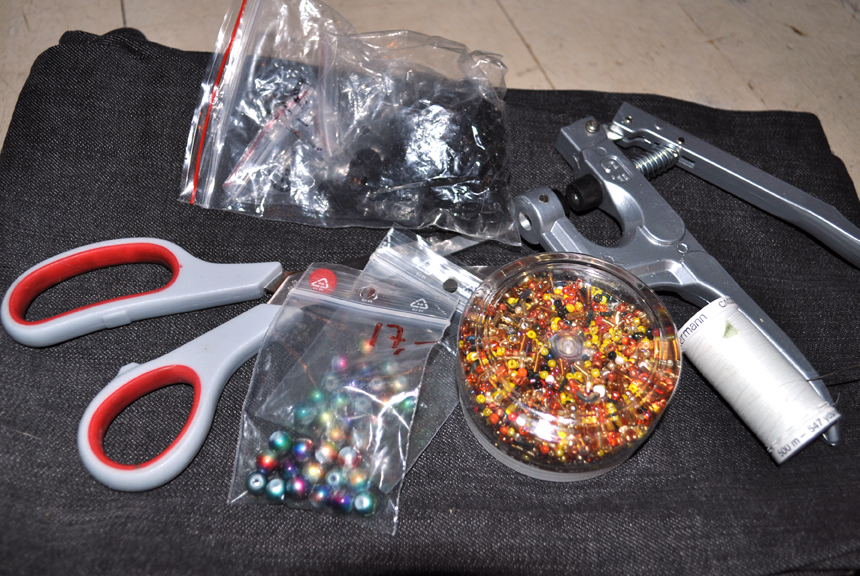
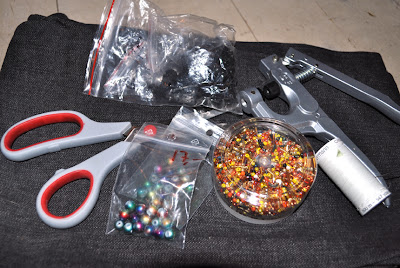
What you need to make these bracelets are as follows:
A worn out pair of jeans
Scissors
Strong thread (I used fishing line for my first one)
Needle
Beads
Push buttons (I’m using a KAM press with buttons that I god from E-bay.)
Scissors
Strong thread (I used fishing line for my first one)
Needle
Beads
Push buttons (I’m using a KAM press with buttons that I god from E-bay.)

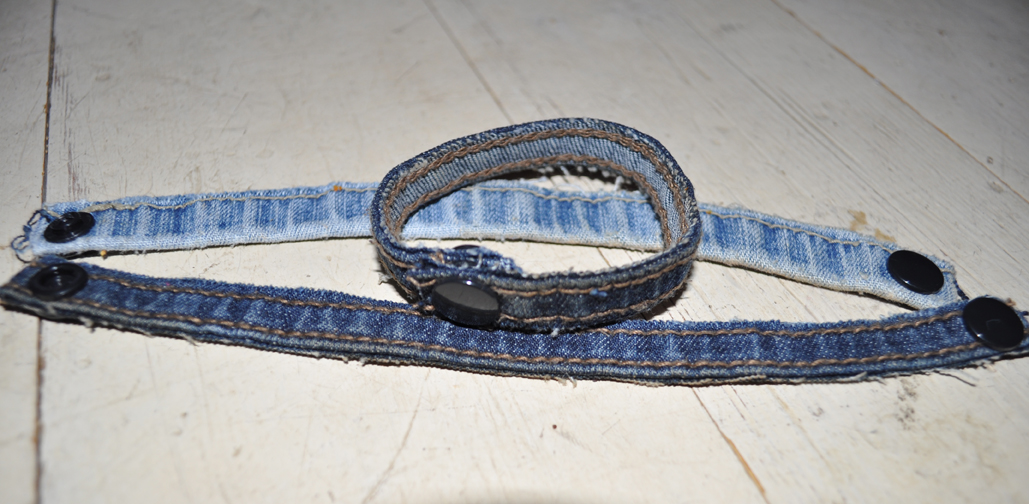
1. Select the seam you want to use. You will find several different ones on one pair of jeans. On mine there were 3 different ones.Number one is of no use for this project; whilst no 2 and 3 is ok. Personally I prefer no 3.

2. Cut out the seam.
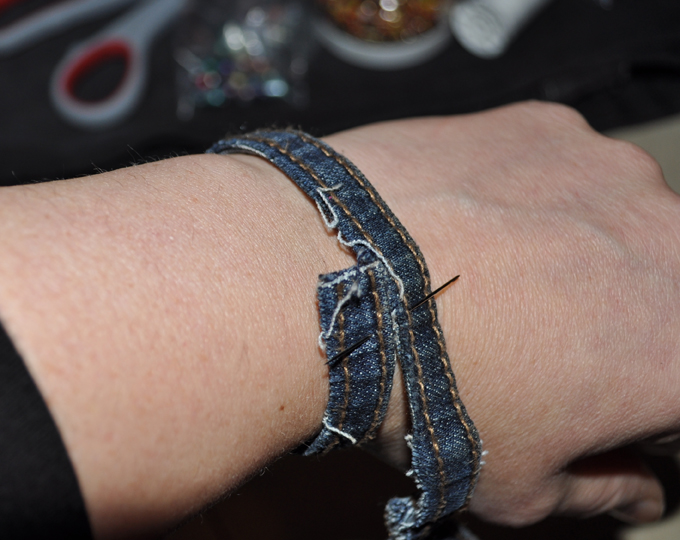
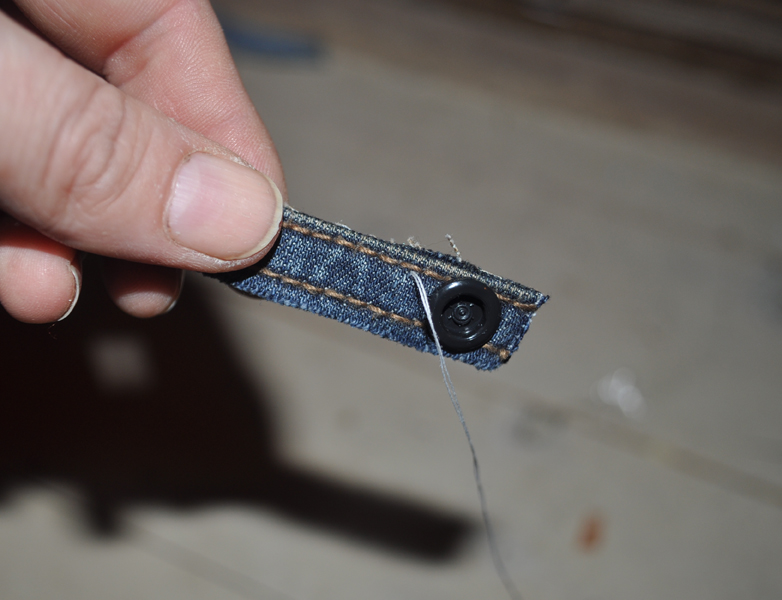
3. Measure the length of the bracelet and add a little extra where the push buttons will be attached. Don’t be tempted to cut it a little shorter because if you use a stretchy denim, because if will not stretch when the beads have been attached. (The needle is only there to hold the seam in place for the picture since I managed to misplace my third hand :)

4. Now it’s time to attach the push button. Follow the instructions for the type of button you decide to use. Mine probably look a lot more complicated than it is. 2 plastic pieces squashed together with the thong in the picture.
5. Now your bracelet is finished and all you have to do is decorate it. I’ll show you two different ways to get you started, but I’m sure that all of you creative people out there can come up with several more. (When you do I would love to see so please let me know)

6. For my first option you need a piece of thread about 2 ½ times the length of the bracelet that you attach to the needle.I could not find my fishing line so I’m using regular thread, but is highly recommended to use something stronger if you want to wear the bracelet more than ones.

7. Start by threading beads on the string in the length of the bracelet.

8.Push the needle trough the bracelet from the front.


9. Go back up after about two beads and down on the other side. Continue this for every two beads till you get to the ends.


10. When you reach the last bead put the needle trough it before you go through the bracelet and fasten the tread on the back.

The second one that I’ll show you is a little more time-consuming, but just as easy to make.
1 You will need a longer thread for this, but because it’s very easy to get I tangled up I would recommend changing when you’re half way finished. You start by putting the needle trough the bracelet from the back. (There should be a knot on the end of the tread to secure it.

2 I’m using some tube shaped beads for this and thread one to the string before I push the needle trough the bracelet to secure it.


3 Move the needle a little to the side before pushing it back up, attaching a new bead and pushing it back down. Continue this one bead at the time till you get to the end. Fasten the tread on the back and you have now finished your second bracelet.
I like to combine several different bracelets and wear them at ones.
Good luck to those of you who decide to have a go!


39 kommentarer:
These are adorable! I'd love for you to share at my party!
bluemattermarketing
Love these! I'll have to make some for my daughters. Thanks for sharing!
Those are really cute! I use a lot of old denim here and have been throwing away the seams. No more!
Such a neat idea! You are so creative to think of something like this! Thank you for sharing!
Love these so much. I would love for you to share your bracelets and more at my weekly linky parties, fri-monday Anything Goes at Bacon Time.
http://bacontimewiththehungryhypo.blogspot.com/
So cute and clever! I'm going to have to try this!
Suzanne, I just gave your blog an award! Come by and see -http://jamesandleighann.blogspot.com/2012/01/my-first-award.html
I pinned this and added it to my always growing list of ideas.
What an awesome idea. I was just tossing out my old jeans! Thanks for the tute!
Oh that is fabulous! Visiting you from Mom on Timeout Linky Party! :)
-Maureen
http://www.releasemecreations.com
so cute. thank you for sharing!
this is AMAZING! i love them so much!
thanks so much for sharing!
{love} lauryn @ lovenotesbylauryn.blogspot.com
Nice.
Following you via Freestyle Friday.
http://www.sjb-myphotopage.com/
I just featured your denim bracelets on my blog.
sunnyvanilla.blogspot.com
LOVE this idea!!! Happily following you :-)
I found you via the Strut Your Stuff hop & am a new follower.
These are a great project - I think we all have extra jeans around to use for the base!
Brooke
http://cupcakecucumber.blogspot.com
http://blueberrysquash.blogspot.com
Great idea, I'm going to try this
brilliant idea, beautiful result!
I love these! So creative!! Thanks for sharing at my party!
ADORE!
Thank you for sharing on Fresh Fridays!
These are so cool! I love them all grouped together. Thanks so much for sharing at The Creative Spark. I'll be featuring them today. Hope to see you again!
Jenn :)
Found your post via Flamingo Toes!
Thank you SO much for sharing, these bracelets are GREAT!! I pinned them too!
~Michele
these bracelets are so fun! I featured these on my twitter page, thanks so much for linking up to Your Whims Wednesday! Feel free to grab a featured button at this week's party :)
Featuring Wednesday this week at Bacon Time :)
These bracelets are way cute! Thanks for linking up to "Strut Your Stuff Saturday." We would love to have you share more terrific ideas next Saturday. -The Sisters
What a great 'recycle' project! Thanks for the wonderful tutorial!
Judi, Minneapolis, MN, USA
Those are so fun ... thanks for sharing the tutorial!
They are so pretty - I've got a huge bead collection so I am going to be making some myself too - great tutorial
Thank you for sharing this tutorial, the bracelets are GREAT!!!! Love them!!
Hi Susanne! Your denim bracelets are darling! What a fun idea! I found you through Think Pink Sundays. Thanks for sharing! :)
I love these - want a whole wrist full! I have a question - what is that really cool large round irridescent bead you used? I'm in love with those. And I must get the push button or snap tool - that's fabulous!
Thanks everyone for your nice comments! They are highly appriciated!
Quiltrobin: I dont know much about the beads exept that they are made of some type of plastic material. I got a few for next to nothing in a closing sale here in Norway. Sadly I have yet to find them anywhere else
Wow! Such a fabulous denim bracelet is this. I will refer this to my friend who really loves accessories. Thank you.
I’ve desired to post about something similar to this on one of my blogs and this has given me an idea. SAT Tutor Gulf Stream Cool Mat.
Couldn't be written any better. Reading this post reminds me of my old room mate! He always kept talking about this. I will forward this article to him. Jupiter Island Tutoring Pretty sure he will have a good read. Thanks for sharing!
Thanks for posting! I really like what you've acquired here; You should keep it up forever!Sunny Isles Tutoring Best of luck
This is a great inspiring article.Wellington Tutoring I am pretty much pleased with your good work. You put really very helpful information. Keep it up. Keep blogging. Looking to reading your next post.
This is very nice blog because information provided here through the article and the pictures are very effective. Palm Beach Tutoring Because sometimes words cannot explain the things that pictures can and here the words and pictures both are expressing the things in balance.
It was a beneficial workout for me to go through your webpage. Private tutor Wellesley It definitely stretches the limits with the mind when you go through very good info and make an effort to interpret it properly. I am going to glance up this web site usually on my PC. Thanks for sharing
Thanks a lot for sharing. Private tutor Sag Harbor Will check back later for more of your articles.
Legg inn en kommentar